Publishing Test Cases
To publish test cases created in Studio, you must set them as publishable, because both test cases and data-driven test cases are created as drafts by default.
Guided walkthrough
Business case: Imagine you're a Test Automation Engineer at UiBank. You've created a test case to check loan status for different variations (short term, mid term, etc.). Now you want to link it to Test Manager, publish it to Orchestrator, and upload the results directly to Test Manager.
Before you start, make sure you have:
✅ Access to the UiBank web application.
✅ Access to Orchestrator and Test Manager in Automation Cloud.
✅ The Assistant connected to your Orchestrator instance.
If you haven't already, go back and complete the data-driven test case guided practice first.
Step 1 — Set your test case as publishable
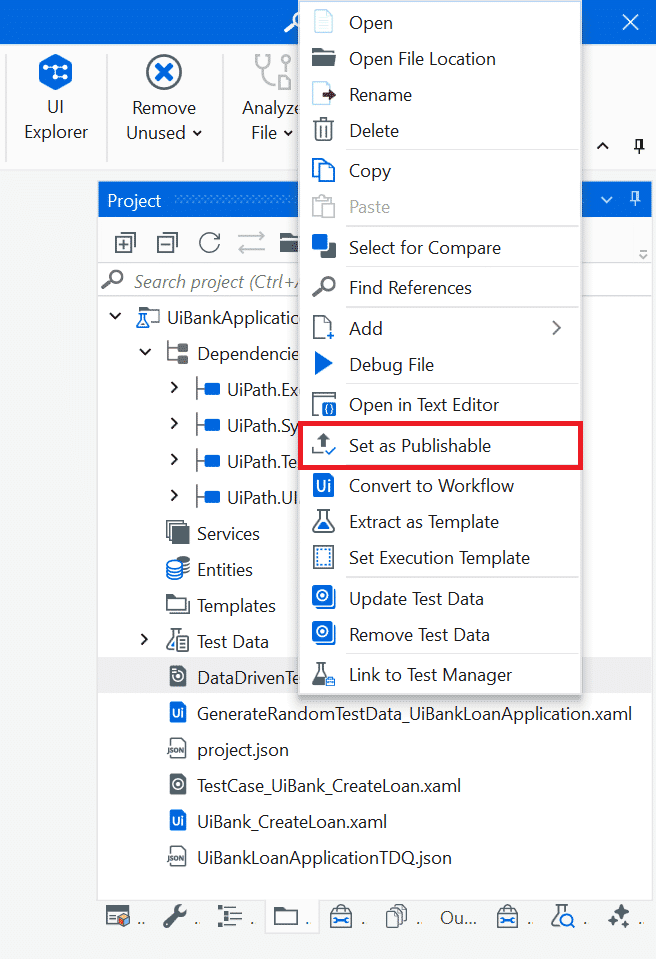
Select the test case, right-click, and choose Set as publishable.
Note
You can select multiple test cases and set them as publishable at once.
Step 2 — Publish the test case
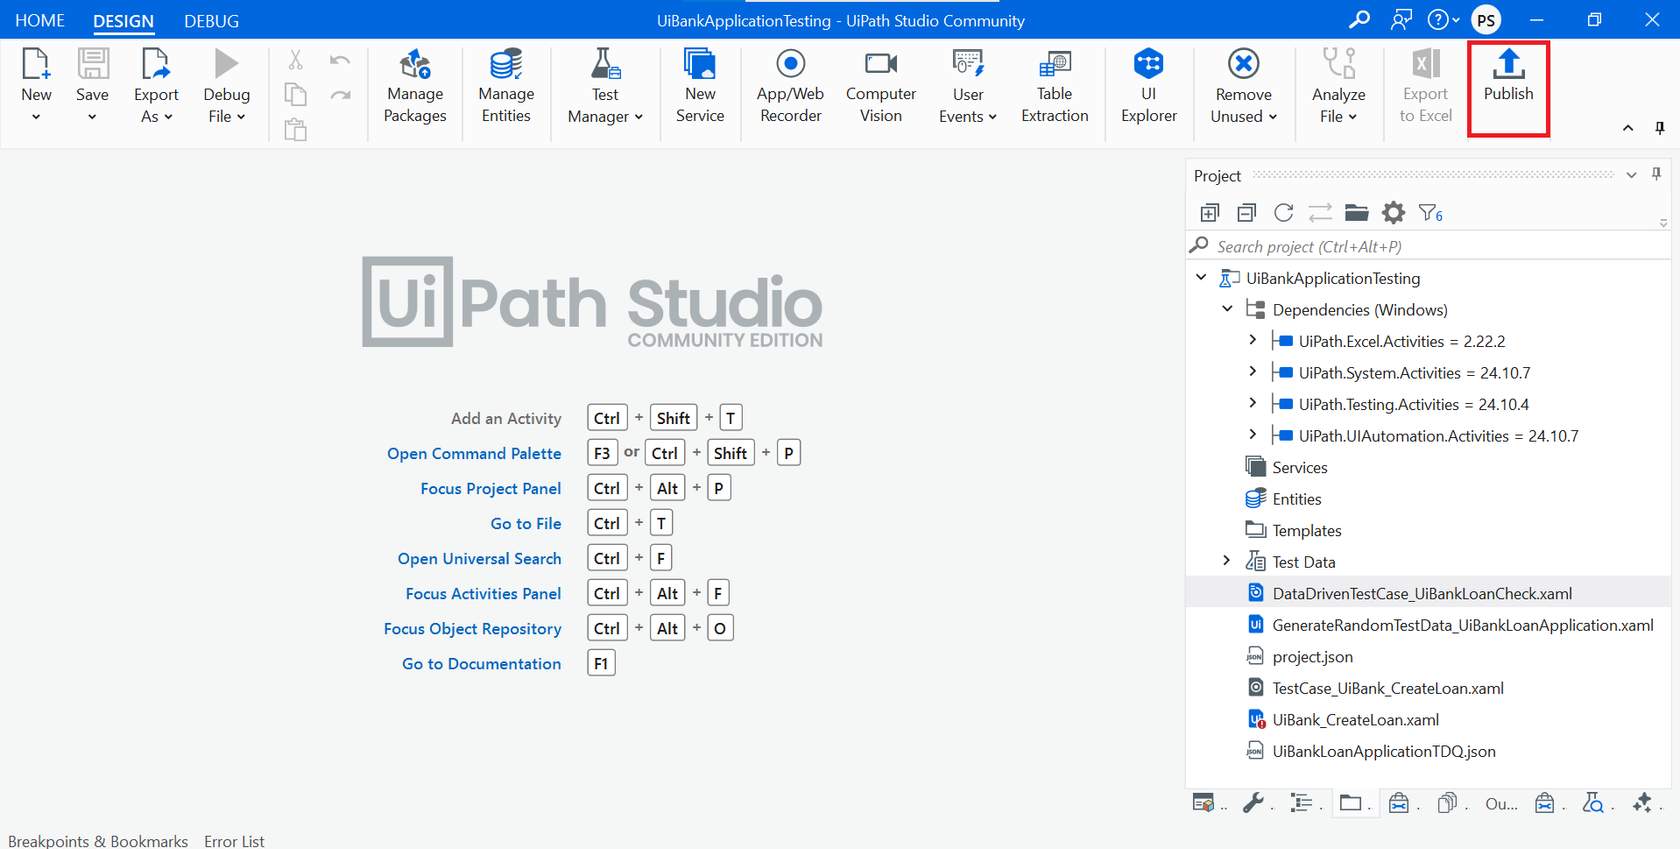
Publish the test case to Orchestrator by clicking Publish on the ribbon.
Step 3 — Confirm the publish
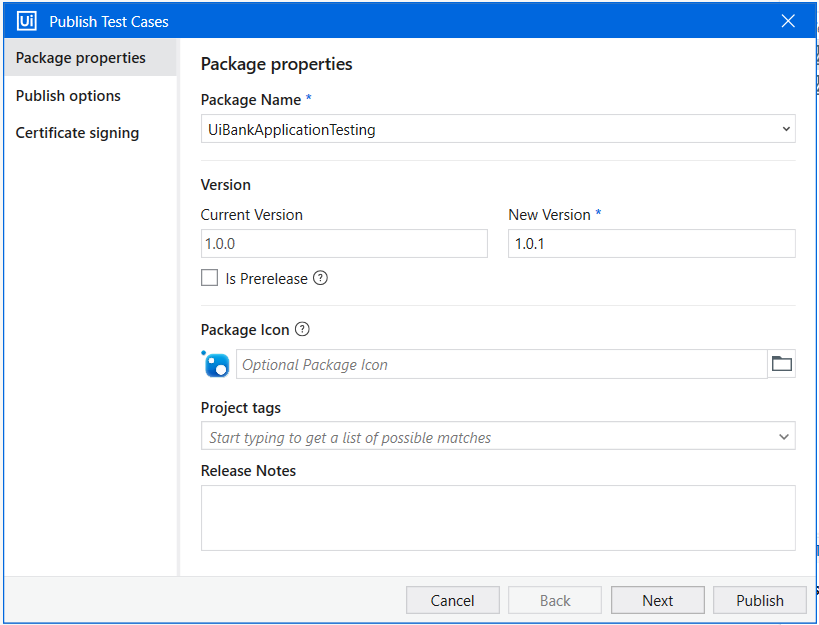
Add the project name and the version you'd like to publish as.
Nice work!
You've successfully published the test case to Orchestrator.
Before you publish
Make sure your Robot or Assistant is connected — publishing to Orchestrator requires it.